Monday, September 22, 2014

Apple Fritters

This is a variation of one of my boys’ (and my dad’s) favorite breakfast foods. And just the thing to make when you have a bunch of apples!

apple fritters - The Backyard Farmwife

1 cup milk

2 eggs

1 Tbsp oil

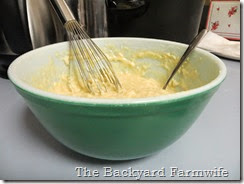
Whisk these together in a bowl.

2 cups flour

3 tsp baking powder

1 tsp salt

4 Tbsp sugar

Whisk in flour 1/2 cup at a time. Add remaining dry ingredients after first cup of flour is mixed. Mix until smooth.

Stir in 1 medium apple, peeled and finely chopped.

apple fritters - The Backyard Farmwife

Drop into hot oil heated to 375. Cook until golden brown on all sides. Turn while cooking if necessary.

apple fritters - The Backyard Farmwife

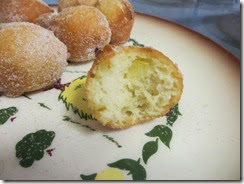
Remove from oil and let drain on plate lined with paper towels.

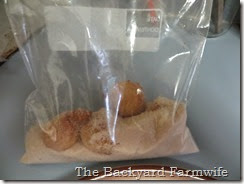
Toss while still hot in a bag of cinnamon sugar.

apple fritters - The Backyard Farmwife

Eat right out of the bag! :o)

apple fritters 07

Friday, September 12, 2014

Strawberry Cream Cheese Stuffed French Toast

This summer has been glorious and sunny! If only every summer in the PNW was like this!!! In celebration of yet another sunny morning, I took some homemade strawberry freezer jam out (made with strawberries from my own garden no less) and created this…

strawberry cream cheese stuffed French toast - The Backyard Farmwife

1 1-lb loaf Italian bread

1/2 cup strawberry jam (I think it would be pretty tasty with orange marmalade instead)

2 ounces cream cheese, softened

1/8 cup powdered sugar

1 teaspoon grated orange zest

3 eggs

1 cup milk

1 teaspoon vanilla

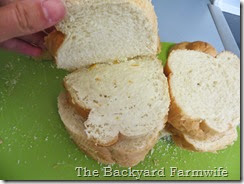
Slice the bread into 9 slices. Cut each slice in half, making a pocket. Do not cut them all the way through! I made all my pocket slices before cutting them into thin slices all the way through…

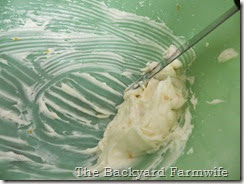
strawberry cream cheese stuffed French toast - The Backyard FarmwifeMix the cream cheese, sugar and orange zest with electric mixer until smooth. Spread it inside of each slice of bread.

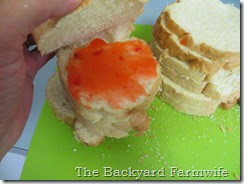
strawberry cream cheese stuffed French toast - The Backyard Farmwife strawberry cream cheese stuffed French toast - The Backyard Farmwife Next, spread a thin layer of jam on top of the cream cheese.

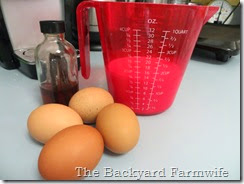
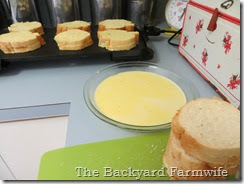
strawberry cream cheese stuffed French toast - The Backyard FarmwifeBeat the eggs, milk and vanilla well. Pour into shallow pan for dipping.

strawberry cream cheese stuffed French toast 05(I made too much egg, so I changed it in the recipe)

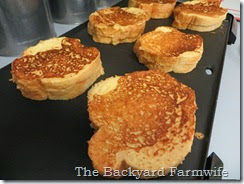
  Dip each piece of bread in the egg mixture on each side. Don’t soak it too much! Place on a preheated and lightly greased griddle. I set mine at 350.

strawberry cream cheese stuffed French toast - The Backyard Farmwife Cook until both sides are browned.

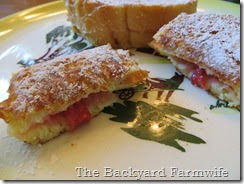
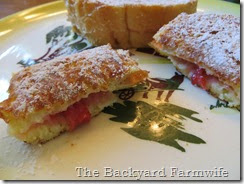
strawberry cream cheese stuffed French toast - The Backyard FarmwifeServe immediately dusted with powdered sugar.

strawberry cream cheese stuffed French toast - The Backyard Farmwifestrawberry cream cheese stuffed French toast - The Backyard Farmwife

Thursday, June 5, 2014

Poppyseed Chicken & Mushrooms

I love Rhett and Link! I watch their Good Mythical Morning show while I eat breakfast five days a week. One morning, Link happened to mention that poppyseed chicken and how much he loves it. I’d never even heard of poppyseed chicken. But it piqued my interest and I did a bit of research “boop boop boopity boop” (it’s an inside GMM joke). I found a few recipes to get the idea and then went off and made up my own…

Yup! Link was right. So good!!! One of those total comfort food meals and just sticks to your ribs. It’s rich and creamy and delicious… Mmmm!!!

poppy seed chicken & mushrooms - The Backyard Farmwife

4-5 cups of cooked chicken breast, cubed

8 oz fresh mushrooms, thickly sliced

1 can cream of mushroom soup

3/4 cup sour cream

2 Tablespoons poppyseeds

6 Tablespoons melted butter

1 sleeve of Ritz cracker, crumbled

Preheat oven to 350

Combine chicken, mushrooms, soup and sour cream. Pour into greased casserole dish.

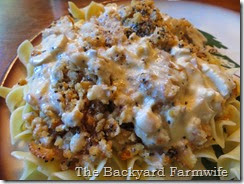
Mix poppyseeds, butter and cracker crumbs. Sprinkle over chicken mixture.

Bake for 30 minutes or until it is bubbly and topping starts to turn golden brown.

Serve over cooked egg noodles.

Thursday, May 15, 2014

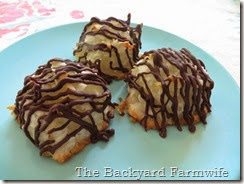
Coconut & Chocolate Macaroons

It’s hard to believe that once upon a time I HATED coconut! Now I can’t even imagine hating coconut. I LOVE the stuff! I’ve had a craving for real honest-to-goodness coconut macaroons for a while now. This seems funny considering the last time I had one I could hardly even keep it in my mouth…

But today I made a batch. They were perfect! They didn’t spread, they were chewy and moist and covered in dark chocolate… Mmmmm!!!

I will be making these again real soon!

1 14oz bag of sweetened shredded coconut (5 cups)

4 large egg whites

1/2 cup sugar

1 teaspoon vanilla extract

1 teaspoon almond extract

3/4 cup chocolate chips

1 Tablespoon shortening

Preheat the oven to 325. Line baking sheet with parchment and spray the parchment with cooking spray. These suckers are sticky!!!

Beat the egg whites, sugar, and extracts with an electric mixer until they are foamy but not white. The sugar might not be completely dissolved, but don’t worry about it.

Stir in the coconut. Mix well.

Pack the mixture into a cookie scoop good and tight. Place on the papered and sprayed baking sheet. You can make them small or a bit larger. But I wouldn’t go bigger than 2 Tablespoons…

Bake for 20 minutes or until the edges start to brown. A bit of the tops will start to brown, too. Don’t overbake them! They will be super dry and icky!

Remove from the oven. Let them cool on baking sheets for a few minutes before removing from the baking sheet. Cool on wire racks.

After the cookies are cool, melt chocolate chips with shortening in microwave. Melt for 1 minute. Stir well. Melt in additional 15 second increments until completely melted and smooth.

Either did the bottoms of the macaroons into the chocolate or drizzle over the tops. Store in the fridge for 3-5 days or freeze for longer storage. But I’m guessing they won’t be around that long…

coconut chocolate macaroons - The Backyard Farmwife coconut chocolate macaroons - The Backyard Farmwife

Wednesday, March 19, 2014

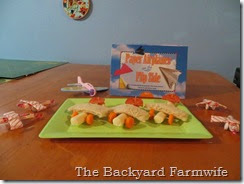
String Cheese Airplane Snacks

Twice a month I watch our godson and his little sister. Every time they come over, we choose a different subject and do a mini unit-study. Guess what we learned about today?

airplane snacks - The Backyard Farmwife Yup! We learned all about airplanes. Here are some fun facts about airplanes you may not have known:

1. A Boeing 747 is 150 feet long. The Wright Brother’s first flight at Kitty Hawk was only 120 feet.

2. The Concorde flew at over 1300 mph and made the flight from NY to London in 3 hours!

3. Modern 747s have just 365 controls. The first models had 971!

4. Airplane themed snacks are really easy to make! :o)

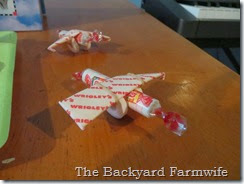
First we made candy planes. The kind with Smarties, Wintergreen Life Savers and a stick of gum all held together with a rubber band. I hadn’t seen these since I was a kid. It was extra fun because we all shut ourselves into our window-less bathroom and watched the Life Savers spark in our mouths when we bit them. I hadn’t done that since I was a kid either. My poor 17-year-old had never done it or seen it. I think he thought it was cooler than he let on… ;o)

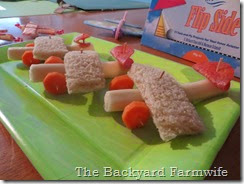
airplane snacks - The Backyard FarmwifeBut for our more healthy snack, we made string cheese airplanes.

airplane snacks - The Backyard FarmwifeAll you need is a piece of string cheese, two carrot slices, a rectangular piece of bread and a slice of pepperoni.

Stick a toothpick through the front of the string cheese and poke one carrot slice on each end. Break a second toothpick in half. Use one half to secure the bread “wing” to the top of the cheese. Fold the slice of pepperoni in half and then use the second half toothpick to secure it to the back of the cheese with the open end opening to the rear of the “plane”.

If you want a fun and educational movie to watch while you enjoy these treats, check out Andy’s Airplanes episode one on YouTube. You can link to it HERE

Saturday, March 15, 2014

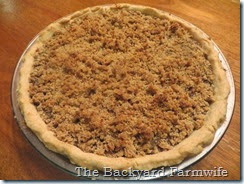
Gingersnap Crumb Pie Topping

This crispy gingersnap topping can go atop any of your favorite crumb-topped pie recipes. Just follow your recipe and substitute this for the topping. It is especially good on top of apple or pear pies. For an added ginger-y treat, add 1/4 cup of chopped candied ginger to your pie filling.

For the perfect topping, add brown sugar to your whipping cream instead of white or powdered sugar.

1/2 cup flour

1/4 cup sugar

1/4 cup brown sugar

1/2 cup coarsely chopped gingersnaps (the crispy kind)

5 Tablespoons butter, softened

Mix first 4 ingredients in a bowl. Cut in the butter until it forms crumbs.

Sprinkle over the top of your favorite pie recipe and bake according to your recipe.

gingersnap crumb pie topping - The Backyard Farmwife

Tuesday, March 11, 2014

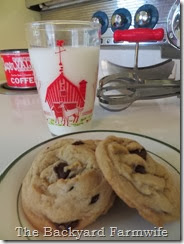
Healthier (but not too healthy) Chocolate Chip Cookies

To celebrate (or should I say, commiserate) the fact that I got bifocals yesterday, I baked a batch of chocolate chip cookies using a new recipe that I concocted in hopes that it will be healthier for my not-so-young-anymore body but not so healthy that they taste healthy. You know what I mean, right?

This batch wasn’t super healthy since I stuffed half of them with Rolos or chocolate peanut butter and baked them in mini muffin pans. Hey, I was feeling pretty down about the whole bifocal thing! ;o)

I think this just might do the trick…

1/2 cup butter, softened

1/4 cup coconut oil, softened

3/4 cup brown sugar

1/4 cup sugar

1 teaspoon vanilla

1 egg

2 scant cups flour

1 teaspoon baking soda

2 teaspoons cornstarch

1 teaspoon salt

1 cup chocolate chips

Preheat oven to 350.

Cream the butter, coconut oil, sugars and vanilla together with electric mixer. Add egg and mix until well combined.

Stir together dry ingredients in a small bowl. Add to creamed mixture in 3 separate batches, mixing well after each addition.

Stir in chocolate chips with a wooden spoon.

Drop onto ungreased baking sheet. Bake about 10 minutes or until slightly golden and set.

Let cool 5 minutes before removing from baking sheet to cooling rack.

healthier chocolate chip cookies - The Backyard Farmwife

Friday, February 28, 2014

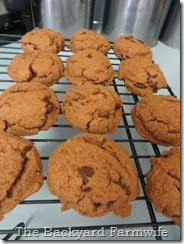
Chocolate Peanut Butter Chocolate Chip Cookies

They are the perfect gluten free cookie because they don’t have any flour at all. It’s hard to imagine that these will actually turn out when you’re making them. But I promise that they do. And with this chocolate peanut butter spread I got from Wal Mart, they are super yummy! You can use plain peanut butter, too but why would you??? ;o)

flourless chocolate peanut butter chocolate chip cookies - The Backyard Farmwife

1 cup chocolate peanut butter

3/4 cup sugar

1 egg

1/2 teaspoon baking soda

1/4 teaspoon salt

Stir well to combine and the stir in 3/4 cup chocolate chips.

flourless chocolate peanut butter chocolate chip cookies - The Backyard Farmwife

Roll into balls and place on baking sheet.

Bake at 350 for about 12 to 14 minutes or until puffy and set. Let cool a couple of minutes before removing from baking sheet to cool on a wire rack.

flourless chocolate peanut butter chocolate chip cookies -The Backyard Farmwife

Monday, February 17, 2014

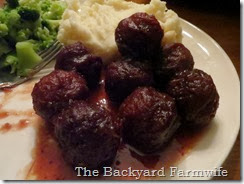
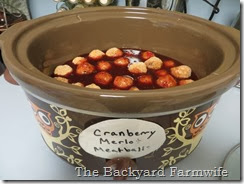
Cranberry Merlot Meatballs

This is one of my new favorite crock pot meals! I can make it in a snap and it tastes rather fancy and elegant. If I use frozen meatballs, it only takes a minute to throw it all together and cooks on high in only about 3 hours. We love it served over mashed potatoes but is also a lovely appetizer!

cranberry merlot meatballs - The Backyard Farmwife

Whisk together:

1 can jellied cranberry sauce

1 cup brown sugar

1 cup merlot (or any red wine or cranberry juice)

2 teaspoons stone ground mustard (or any other hot mustard)

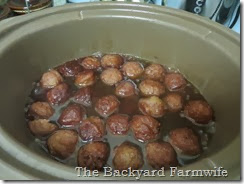
Pour over 30-40 meatballs.

cranberry merlot meatballs - The Backyard FarmwifeCook on high for 3-4 hours or on low for 5-6 hours, or until meatballs are hot.

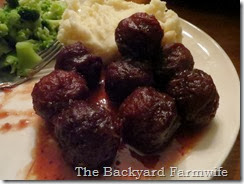
cranberry merlot meatballs - The Backyard FarmwifeServe over mashed potatoes or as an appetizer.

cranberry merlot meatballs - The Backyard Farmwife

Tuesday, January 28, 2014

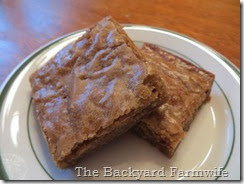
Roca Blondies

We are lucky enough to live only about 2 hours from the Almond Roca factory and their factory outlet store in Fife! I am lucky enough that a friend just happened to mention the store on FB a few weeks ago. I am super lucky enough that we got to go to my BIL’s wedding in Tacoma a couple of weeks ago and make a stop at the store on the way. I am extraordinarily lucky that my sweet hubby let me spend way more money than I should have on Roca candy!!! :o)

One of the treats I brought home was a bag of broken up Almond Roca pieces for cooking.

The first thing I tried was making blondies with some of them stirred in… Jackpot!!!

If you are lucky enough to get your hands on some smashed up Almond Roca, give these a whirl…

Roca blondies - The Backyard Farmwife

1/2 cup butter

1 cup brown sugar

1 egg

1 teaspoon vanilla

1 teaspoon almond extract

1 cup flour

1/8 teaspoon salt

1/2 cup Almond Roca pieces

Preheat oven to 350 and grease a 9” square baking pan.

Melt butter. Stir in brown sugar, egg, vanilla and almond extract. Mix in flour and salt. Fold in Almond Roca pieces.

Spread into prepared pan. Bake 20 minutes or until set and golden brown.

Cool on wire rack.

Sunday, January 26, 2014

Gluten Free Cranberry Orange Scones

I have been making GF things for my friends for a long time. But before now, I have always made flour-free foods. This time I decided to try my hand at truly GF baking.

I wasn’t sure how it was supposed to taste, so I sent it off to my GF tester (aka – my son’s fiancée). She and her sister gave it a “thumbs up”, so here it is…

First I settled on a GF “Bisquick” alternative. I used the one here at glutenfreerecipebox.com.

Then I just used that as a base for making scones.

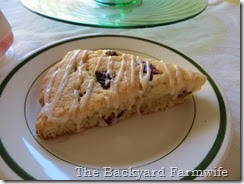
I’ve made scones often enough that I knew what they needed, so I just improvised from there. A little of this, a little of that, butter, cream, cranberries, orange, and of course, powdered sugar glaze, and I had a batch of scones that looked good enough to fool anyone. ;o) Just kidding! But they did look gorgeous!

GF cranberry orange scone - The Backyard FarmwifeNow no one needs to feel left out of your next traditional English tea party…

2 cups GF baking mix

1/3 cup sugar

1/2 cup butter

3/4 cup heavy cream

zest and juice of 1 small orange

1/2 cup dried cranberries

powdered sugar

Preheat oven to 400.

Mix baking mix and sugar in a large mixing bowl. Cut in butter until crumbly. Stir in orange zest and cranberries. Mix in cream, until dough is very well mixed. (I use my hand for this step). Knead about 5 times in bowl.

Pat into a circle about 1” thick. Place on a greased or parchment-papered baking sheet. Cut into 8 wedges, separating them a bit but leaving in a circle.

Bake 15 minutes or until golden brown and pick comes out clean.

Let cool on wire rack for about 30 minutes.

Whisk together powdered sugar and orange juice until smooth to make a glaze that is just thin enough to drizzle over the scones.

Let cool until glaze sets.

Store in airtight container.

Sunday, January 5, 2014

Cranberry Orange Cake w/ Butter Rum Sauce

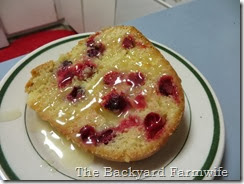
I made this cake for friends who came over for supper on New Year’s Day and we ate THE WHOLE THING! I admit that it was pretty darn tasty though. In fact, it was so tasty that I made another one yesterday. We ate a few pieces and then I put the rest in the freezer to see how it fares.

The cake is good but what really makes it is the warm creamy butter rum sauce! Don’t make the cake without it. It’s really an easy sauce to make and you will not be sorry!

1/2 cup butter, softened

2 cups sugar

2 eggs

1 can evaporated milk

1 teaspoon vanilla

grated zest of 1 small orange

Cream butter and sugar together with an electric mixer. Add eggs,zest, vanilla and milk and mix well.

4 cups flour

2 teaspoons salt

2 Tablespoons baking powder

Add dry ingredients and mix well.

4 cups fresh or frozen cranberries

Carefully fold in cranberries.

Spoon batter (it is quite thick) into a bundt pan that has been well coated with baking spray and then coated with white sugar.

Bake at 350 for 40-50 minutes or until pick inserted into center of cake comes out clean.

Let sit in pan on a rack for 15 minutes before removing.
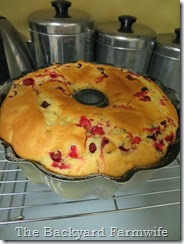
cranberry orange cake  with butter rum sauce - The Backyard Farmwife

Let cool on wire rack at least 15 more minutes before serving.
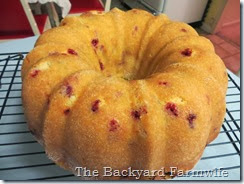
cranberry orange cake  with butter rum sauce - The Backyard Farmwife

Just before serving, make the butter rum sauce.

1/4 cup butter (real butter only)

1/2 cup sugar

1/4 cup heavy cream

1 teaspoon vanilla (or rum extract if desired and omitting rum)

2-3 Tablespoons of spiced rum (optional, I guess… LOL)

Melt butter in small saucepan on medium heat. Add sugar and cream. Whisk until sugar melts and the sauce is hot but DO NOT LET IT BOIL. Remove from heat and whisk in extract and rum.

Serve the cake warm or at room temperature with the hot butter rum sauce on top of each slice of cake. Do not pour the sauce over the entire cake. You can save the sauce in the fridge for 1 day and warm it in the microwave for about 30 seconds to serve again. But I would not keep the sauce longer than 24 hours.
cranberry orange cake  with butter rum sauce - The Backyard Farmwife