Wednesday, January 30, 2013

Andouille Sausage

We just love jambalaya around here! So andouille seemed like an ideal sausage to make… we were right! It made my homemade jambalaya just that much better!!! The recipe for the jambalaya is HERE.

andouille - The Backyard Farmwife

If you are grinding your own pork, check out the sausage basics post HERE.

6 pounds ground pork

4 Tablespoons minced fresh garlic

2 Tablespoons salt

1 teaspoon black pepper

1 teaspoon cayenne

1 teaspoon chili powder

1/8 teaspoon nutmeg

1/8 teaspoon allspice

1/2 teaspoon thyme

1 Tablespoon smoked paprika

3 small bay leaves, ground

1/4 teaspoons dry sage, or 2 fresh leaves finely chopped

1 cup red wine

Mix seasonings in a small bowl. Add to ground pork and mix well until fully incorporated.

Chill immediately. Cook a small bit to check taste. Add more spices or more meat according to your taste. Know that they flavor will alter some after a few days.

Use within a day or two or freeze for longer storage.

andouille - The Backyard Farmwife

Monday, January 28, 2013

Mexican Mocha Molten Lava Cake

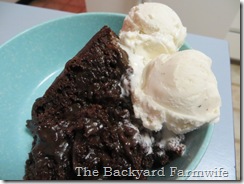
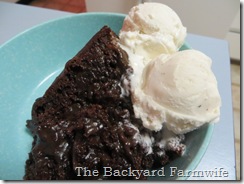
This cake would probably be absolutely fantastic if anyone other than me made it… I am a dismal failure at these things! I can screw up anyone’s foolproof recipe. It breaks my heart because I desperately love the gooey chocolate goodness of a perfectly done lava cake.

My only advice would be to keep an eye on it and not let it get overdone! Oh, and serve it warm with vanilla ice cream… :o)

Mexican mocha molten lava cake - The Backyard Farmwife

1 devil’s food cake mix

Prepare cake mix according to the directions on the box and substitute 1/4 cup of the milk or water for 1/4 cup of Kahlua or strong coffee. Also add 1 teaspoon cinnamon, 1/2 teaspoon chili powder and 1/4 teaspoon cayenne.

Pour into a greased 6-quart crock pot.

Mexican mocha molten lava cake - The Backyard Farmwife 1 small box of instant chocolate pudding mix

Prepare box of pudding with 2 cups milk. Beat for 1-2 minutes.

Pour over cake batter in crock pot but DO NOT STIR!

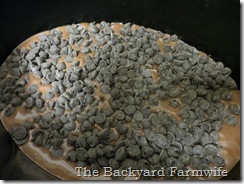
Next sprinkle 1 bag of dark chocolate chips over the entire surface. Again, DO NOT STIR!

Mexican mocha molten lava cake - The Backyard FarmwifeTurn on high and bake for 2-3 hours. It is done when the pudding starts to bubble out on the top. If the top is dry, it has cooked too long! (It is still a fine moist cake but just not the same.)

Serve immediately with a scoop of vanilla ice cream.

Mexican mocha molten lava cake - The Backyard Farmwife

Wednesday, January 23, 2013

Lemon Lavender Shortbread

I needed another dainty treat to eat while watching Downton Abbey, so I searched my memory banks for things I like to eat when we have tea parties… Lavender shortbread cookies are one of those special little treats that are just what I was hoping for!

lemon lavender shortbread  - The Backyard Farmwife I like lemon and lavender paired together, so hence that is what I put in this recipe. I hope you enjoy these with your afternoon tea as much as I do!

1 cup softened butter

1 cup powdered sugar

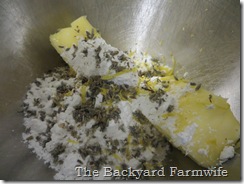
1/2 Tablespoon dried lavender, rubbed in hand to break up large pieces and release oils

grated zest from 1 lemon

1 teaspoon vanilla

Beat until smooth and creamy.

lemon lavender shortbread  - The Backyard Farmwife

2 1/4 cups flour

1/4 teaspoon salt

Mix in flour and salt until stiff dough forms.

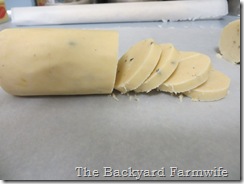
Mold into rolls and wrap in waxed or parchment paper. Chill in fridge over night.

Remove from fridge for 10 minutes. Slice thin (1/4”).

lemon lavender shortbread  - The Backyard Farmwife

Bake at 400 for 8-10 minutes. Don’t let the edges brown!

lemon lavender shortbread  - The Backyard Farmwife

Tuesday, January 22, 2013

Bacon Spinach Quiche

Ever since my pie crust lesson last week, I have been thinking about… pies! I adore quiche but have never made one due to my irrational fear of making pie crusts. But my friend Mary, my mother, my sisters all make it seem so easy; and I did make one crust by myself with supervision. I decided to give it a whirl!

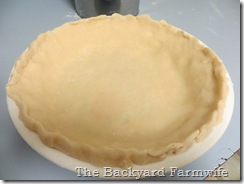
Bacon spinach quiche - The Backyard Farmwife I think that for my very first solo pie crust in 15 years, it turned out amazingly well! Flaky, tender, didn't rip or tear, rolled out to the perfect thickness...

Bacon spinach quiche - The Backyard Farmwife Not bad, huh??? :o)

The bacon spinach quiche I made in it was super amazing!!!

1 – 9” unbaked pie crust

6 eggs

1 1/2 cups milk

salt & pepper

1 cup crumbled bacon

1 cup shredded cheese

2 cups chopped fresh spinach

Beat eggs and milk together. Stir in remaining ingredients. Pour into unbaked pie crust.

Bacon spinach quiche - The Backyard Farmwife

Carefully place in oven preheated to 375. Bake for 45-60 minutes or until center is set.

After 30 minutes, cover loosely with piece of foil to keep crust from over-baking.

Bacon spinach quiche - The Backyard Farmwifeafter 30 minutes

It was pretty puffy right out of the oven after 60 minutes…

Bacon spinach quiche - The Backyard FarmwifeLet quiche sit for about 5 minutes to settle before serving.Bacon spinach quiche - The Backyard FarmwifeI served it with a small side salad and a few slices of quick bread for a light and delicious dinner!

Bacon spinach quiche - The Backyard Farmwife

Monday, January 21, 2013

Easy Lefse

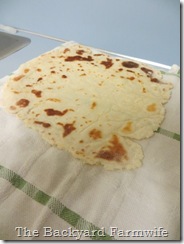
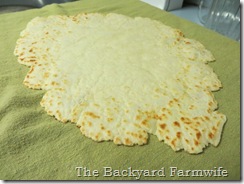
We haven’t had really good Norwegian lefse since leaving MN almost 8 years ago… Friends there seemed to make it perfectly and gave me this great easy shortcut recipe for traditional lefse that is super delicious! Unfortunately I am still getting the hang of making the stuff. It’s not very tender, not rolled quite thin enough and not even close to a circle shape. I call it “rustic”. ;o)  I’m sure my boys wish I would just get more practice so I’d get better at it. We’ll see, we’ll see…

lefse - The Backyard Farmwife

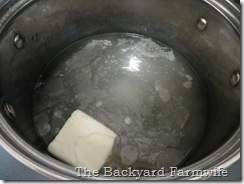
Boil together:

5 cups water

1/2 cup lard or shortening

1 Tablespoon salt

1 Tablespoon sugar

lefse - The Backyard Farmwife

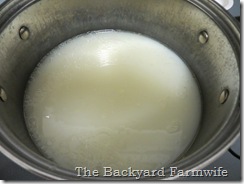
When lard is melted, add 2 cups milk.

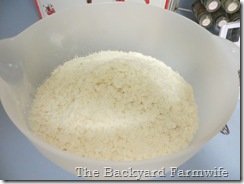
lefse - The Backyard FarmwifePour over 8 cups potato flakes (instant mashed potatoes).

lefse - The Backyard FarmwifeLet cool overnight in fridge.

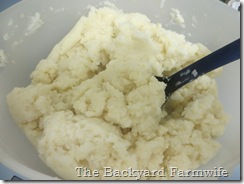
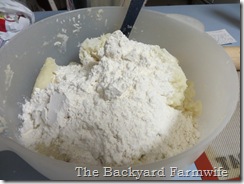
lefse - The Backyard FarmwifeAdd 2 cups flour. Mix well and divide into 2 or 3 balls. Keep the dough you are not working with in fridge to keep cold.

lefse - The Backyard Farmwife

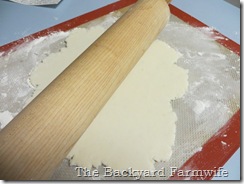
Cut off small pieces and roll out on heavily floured cloth. Brush off excess flour.

lefse - The Backyard FarmwifeCook on griddle at 450 on both sides.

lefse - The Backyard Farmwife  Let cool on wire rack covered with a towel.

lefse - The Backyard Farmwife Serve warm with butter and cinnamon-sugar.

Sunday, January 20, 2013

Peanut Butter & Nutella Pie

On Wednesday I went to a friend’s house in the attempt to overcome my pie crust phobia… While I made a crust while I was there under supervision, I still have yet to make one on my own. So I’m not sure if I’m cured yet??? I have a whole list of pies I want to make, so I am hopeful I am over it!

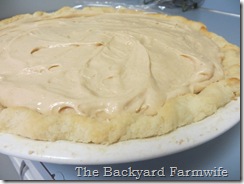
We were all sitting around talking about pie (of course!) and we came up with the peanut butter & Nutella idea. I knew exactly what pie I was going to make first!Peanut Butter & Nutella Pie - The Backyard Farmwife

1/2 cup Nutella

1 8oz box of cream cheese, softened

1 cup powdered sugar

1 cup creamy peanut butter

1 cup heavy cream

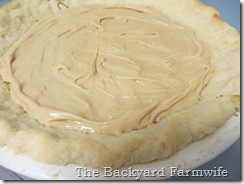
Spread the Nutella into the bottom of a pre-baked or crumb pie crust.

Peanut Butter & Nutella Pie - The Backyard FarmwifeBeat cream cheese, powdered sugar and peanut butter with electric mixer until smooth.

Spread half of this peanut butter mixture into pie crust.

Peanut Butter & Nutella Pie - The Backyard FarmwifeBeat heavy cream until it forms stiff peaks.

Fold whipped cream into the remaining peanut butter mixture. Spread onto top of pie.

Peanut Butter & Nutella Pie - The Backyard FarmwifeChill for several hours. Top with additional whipped cream, if desired. Serve in very small slices as this pie is very rich and delicious!

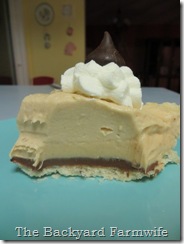
Peanut Butter & Nutella Pie - The Backyard FarmwifeI love how you can see all three layers!

Thursday, January 17, 2013

Applesauce Oatmeal Amish Bread

You know that Amish Friendship Bread starter that goes around churches and moms’ groups every couple of years? The one you either love or hope no one tries to give you? We love that stuff around here! And thanks to the discovery that you can freeze it when you’re sick of it and can make it only for yourself (no need to share), we love it even more!

I recently acquired one and when Day 10 finally arrived only to reveal that I didn’t have any pudding!

Now I really like my stay-at-home days a LOT! I’m quite the hermit and I was determined NOT to go to the store just for one box of pudding! (Yes, you really only need 1 small box of pudding and it’s just fine!) There had to be a recipe somewhere on the vast and helpful internet for Amish Friendship Bread without pudding…

There were some, but none of them really appealed to me very much. So I made up my own…

1 cup starter

2/3 cup oil

1/3 cup applesauce (I used my homemade applesauce)

1/2 cup sugar

1/2 cup brown sugar

1 teaspoon vanilla

1 1/2 cups flour

1/2 cup whole wheat flour

3 eggs

1 1/2 teaspoons baking powder

1/2 teaspoon salt

1 teaspoon cinnamon

1/2 cup homemade apple instant oatmeal

Add 1 ingredient at a time in the order listed, stirring well after each addition.

applesauce oatmeal amish bread - The Backyard Farmwife

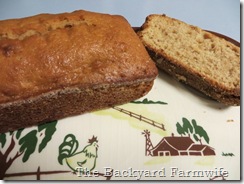
Grease and sugar 2 loaf pans. Pour batter into pans. Bake at 350 for 45-60 minutes or until pick comes out clean.

applesauce oatmeal amish bread - The Backyard Farmwife

If you still really want to use pudding here’s my original recipe.

Tuesday, January 15, 2013

Linguica

I have to admit that when Kate suggested we make Linguica, I had never even heard of it. But we had 80 pounds of pork butt to make into sausages so I figured we might as well give it a whirl… It turns out it’s a Portuguese sausage made with paprika and garlic, and that’s precisely what we made! ;o)

It makes a lovely soup that was so delicious that I’m not sure I want to use it for anything else…

linguica sausage - The Backyard Farmwife

Here’s how you can make your own: You can also check out sausage making tips HERE.

5 pounds ground pork butt

2 Tablespoons paprika

1 Tablespoon smoked paprika

2 Tablespoons minced fresh garlic

5 teaspoons salt

1/2 cup red wine

1/2 Tablespoon sugar

2 teaspoons oregano

1 teaspoon cracked black pepper

1 teaspoon red pepper flakes

Mix seasonings in a small bowl. Add to ground pork and mix well until fully incorporated.

Chill immediately. Cook a small bit to check taste. Add more spices or more meat according to your taste. Know that they flavor will alter some after a few days.

Use within a day or two or freeze for longer storage.

linguica sausage - The Backyard Farmwife

Monday, January 14, 2013

Cranberry Orange Cream Scones

Nothing is better than watching Downton Abbey with a friend than watching Downton Abbey with a friend while enjoying a cup of Bombay Breakfast and eating one of these jolly little scones!

cranberry orange cream scones - The Backyard Farmwife

2 cups flour

1 Tablespoon baking powder

3 Tablespoons sugar

1/2 teaspoon salt

grated zest from 1 orange

Pulse in your food processor about 6-7 times.


5 Tablespoons cold butter cut into small pieces

Pulse 6 times.

Add 1/2 cup dried cranberries

Pulse 6-7 more times.

Pour flour mixture into a mixing bowl. Add 1 cup cold heavy cream.

Mix until combined. Turn onto cutting board and lightly knead 5-10 times.

Divide dough into half. Roll into 2 balls. Place on baking sheet covered with parchment. Pat into a circle about 1” thick. Cut each circle into 8 small wedges (I use a pizza cutter) and separate slightly.

Sprinkle liberally with course sugar.

Bake at 425 for about 15-20 minutes or until tops turn light golden brown.

Let cool on wire racks.

Sunday, January 13, 2013

Kettle Corn at Home

Kettle corn… that perfect combination of salty and sweet! I love kettle corn but hate that I have to wait until I go to the fair or some other large outdoor event to have the stuff… Why can’t I just install a giant cauldron in my dining room and make it all year round???

Now I don’t have to wait anymore! Now I can have it at home any time I want without the giant cauldron of yummyness! Wow! This could be dangerous!!! LOL

kettle corn - The Backyard Farmwife

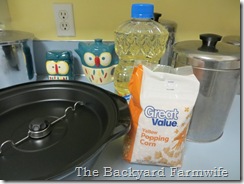
All you need is a stirring popcorn popper… I know you can do it in a large stockpot, but I don’t know how to do that. ;o)

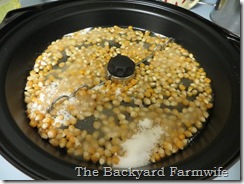
Pour 1/2 cup popcorn evenly into the bottom of your popper. Top with 3 Tablespoons vegetable oil. Sprinkle with 3-4 Tablespoons of white granulated sugar.

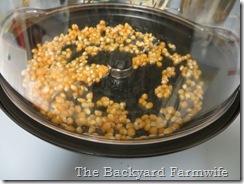
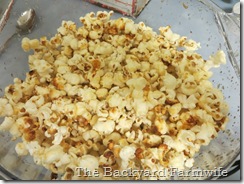
kettle corn - The Backyard FarmwifeThen you sit and watch it until it pops… There is something sort of magical about getting to watch all those hard little kernels explode into fluffy white puffs of deliciousness!!! So much better than microwave stuff! Does that make me a huge popcorn nerd???

kettle corn - The Backyard Farmwife

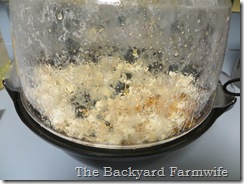
kettle corn - The Backyard FarmwifeWatch and listen to your kettle corn very closely! You want to stop it AS SOON AS YOU HEAR THE POPPING START TO SLOW! This stuff burns really easily!

Carefully flip over your bowl (after you put the cover back on the lid/bowl) and enjoy it while it is still warm!

kettle corn - The Backyard Farmwife

Tuesday, January 8, 2013

Easy Caramels

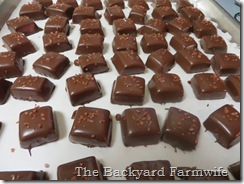
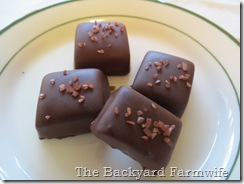
I LOVE caramels! A LOT!!! In fact, they may just be my favorite candy. Sorry chocolate! :o) This recipe is so easy to make and they are perfect, chewy but they don’t stick to your teeth (I hate that) and buttery smooth. PERFECT!!! My favorite way to have caramel is with chocolate or salted with kosher  or coarse sea salt. Sometimes I do both…
dark chocolate salted caramels - The Backyard Farmwife

*This is by far my most requested recipe! Mainly because when people try them, they must have them! They are also my most requested party food or gift. People also demand them of my in return for favors I have requested of them. ;o)

I have perfected the recipe since I posted this almost two years ago.

1 cup butter or margarine ( I use margarine because I read that it makes a less sticky caramel)

2 1/4 cups brown sugar

1 can condensed milk

1 cup corn syrup

1 pinch salt ( I use about 1/4 tsp)

1 1/2 teaspoons vanilla

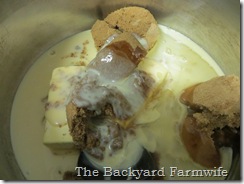
In a heavy bottomed saucepan over medium heat, combine the butter, brown sugar, sweetened condensed milk, corn syrup and salt.
dark chocolate salted caramels - The Backyard Farmwife

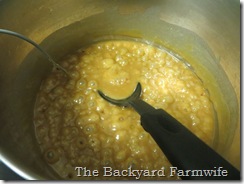
Bring to a boil, stirring constantly.
dark chocolate salted caramels - The Backyard Farmwife

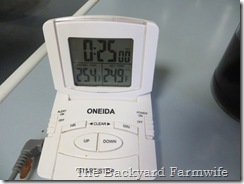
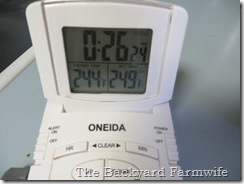
Heat to 248-250 degrees F  Cook for 2 minutes at that temperature. This process takes about 30 minutes or so. When the caramel reaches 249 that can’t be immediately stirred down to a lower temperature, set the timer for 2 minutes. It just needs to stay around 249 for the 2 minutes. It can be a bit higher and a bit lower (towards the end of the time) and still be ok. Don’t let it go higher than 254 or lower than 244. Remove the pan off the heat if necessary. This is the trickiest part, but you’ll get the hang of it.
dark chocolate salted caramels - The Backyard Farmwife dark chocolate salted caramels - The Backyard Farmwife

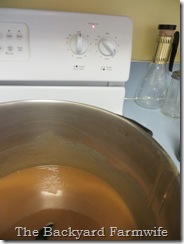
Remove from the heat and stir in vanilla.
dark chocolate salted caramels - The Backyard Farmwife

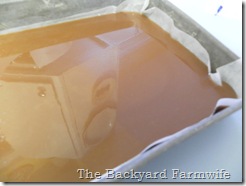
Meanwhile, butter a parchment-lined 9x13 inch baking pan. When the caramel is ready, pour into the buttered pan.
dark chocolate salted caramels - The Backyard Farmwife

Allow to cool completely at room temperature. Remove from the pan and cut into squares using scissors or a sharp knife. The perfect caramel isn’t too hard when chilled and can hold its shape when at room temp.
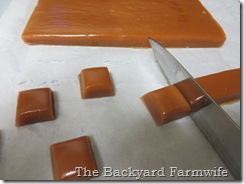
dark chocolate salted caramels - The Backyard Farmwife

If they are too soft wrap individual pieces in waxed paper or plastic wrap so they will hold their shape.

To make the chocolate dip just melt 1 cup of dark chocolate chips with 1 scant Tablespoon of shortening or vegetable oil. (This helps keep the chocolate from getting soft at room temp.) Dip the caramels into the chocolate on a fork, lift caramel out of the chocolate and tap off the extra on the side of the bowl. Carefully set on a piece of parchment or wax paper. Let set a couple of minutes before sprinkling with salt. Don’t let the chocolate set before putting the salt on top!
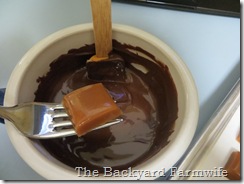
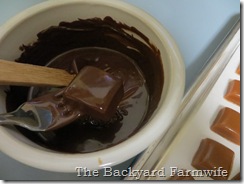
dark chocolate salted caramels - The Backyard Farmwifedark chocolate salted caramels - The Backyard Farmwifedark chocolate salted caramels - The Backyard Farmwife 

Place in fridge to speed up the setting of the chocolate and store in fridge. But these are best served at room temperature.

Enjoy and try not to eat them all at once! :o)